Connect Intune with ServiceNow CMDB Guide 2025
The short-term objective of most companies is clear: reducing manual intervention and improving data accuracy. How can you ensure seamless synchronization of IT asset data between Microsoft Intune and ServiceNow CMDB? This connection not only centralizes IT asset management but also empowers organizations to maintain an up-to-date inventory, enabling efficient decision-making and operational excellence.
Follow this simple step-by-step guide.

Before you start
Please install these plugins before the next steps:
- System Import Sets(com.glide.system_import_set) : 1.0.0 or above
- Integration Commons for CMDB(sn_cmdb_int_util) : 2.12.0 or above
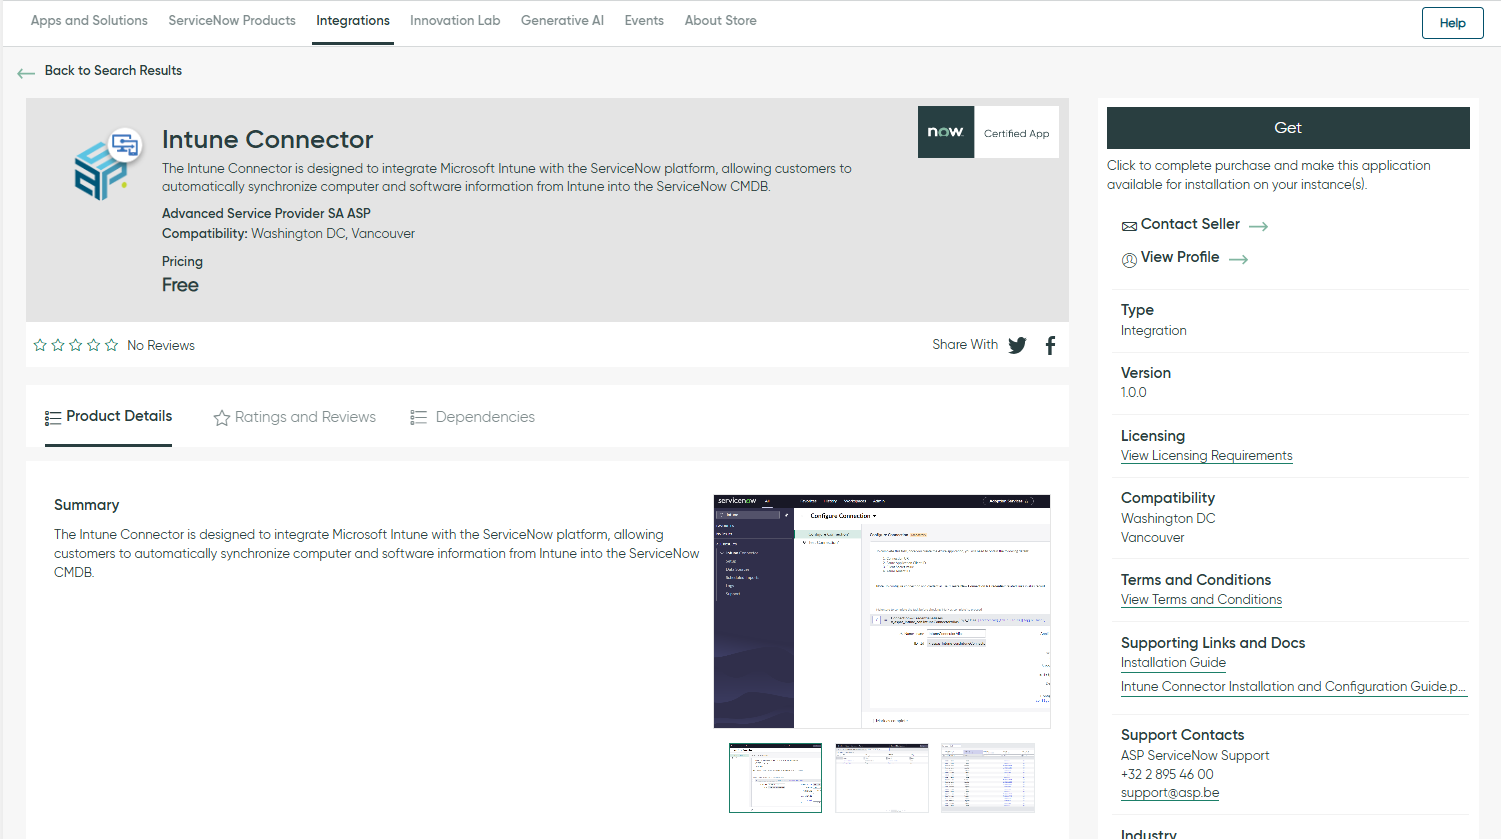
1. Install the Intune Connector for ServiceNow
Get the application here: ServiceNow Store – Intune Connector
2. Configuration
Note: To configure the guided setup for the Intune Connector application, the user must have either the “admin” role or the “x_aspas_intune_con.admin” role. These roles provide the necessary permissions to access and complete the guided setup tasks, ensuring proper configuration of the connection, scheduled imports, and other essential settings.
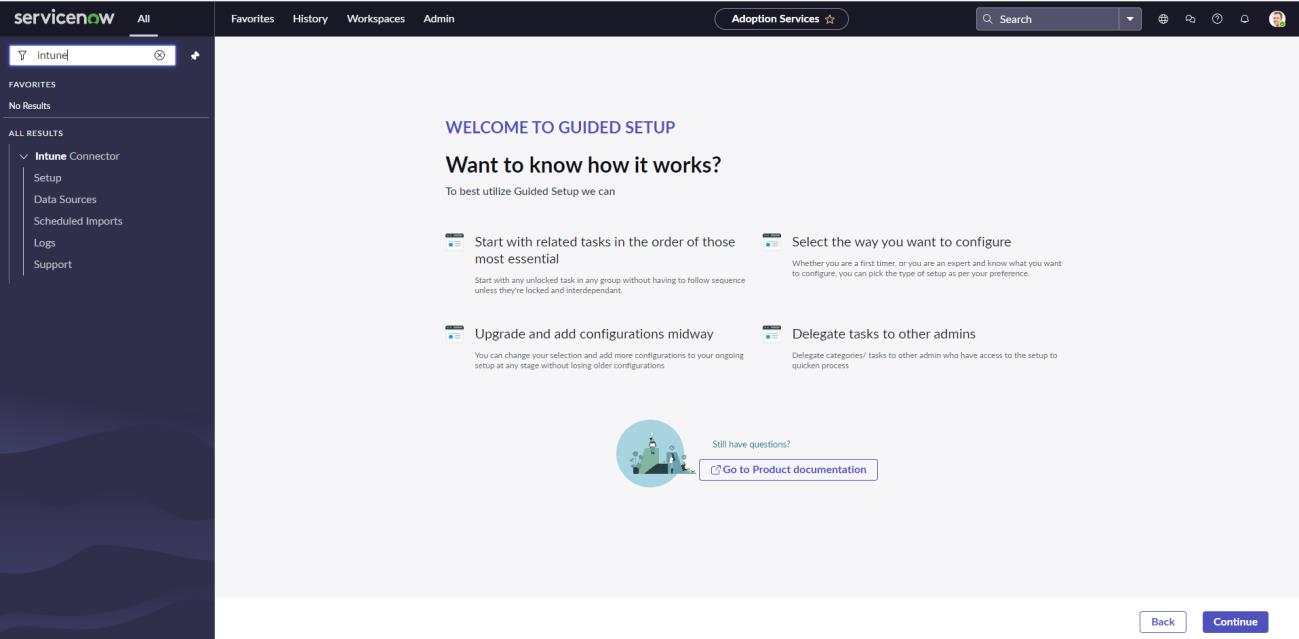
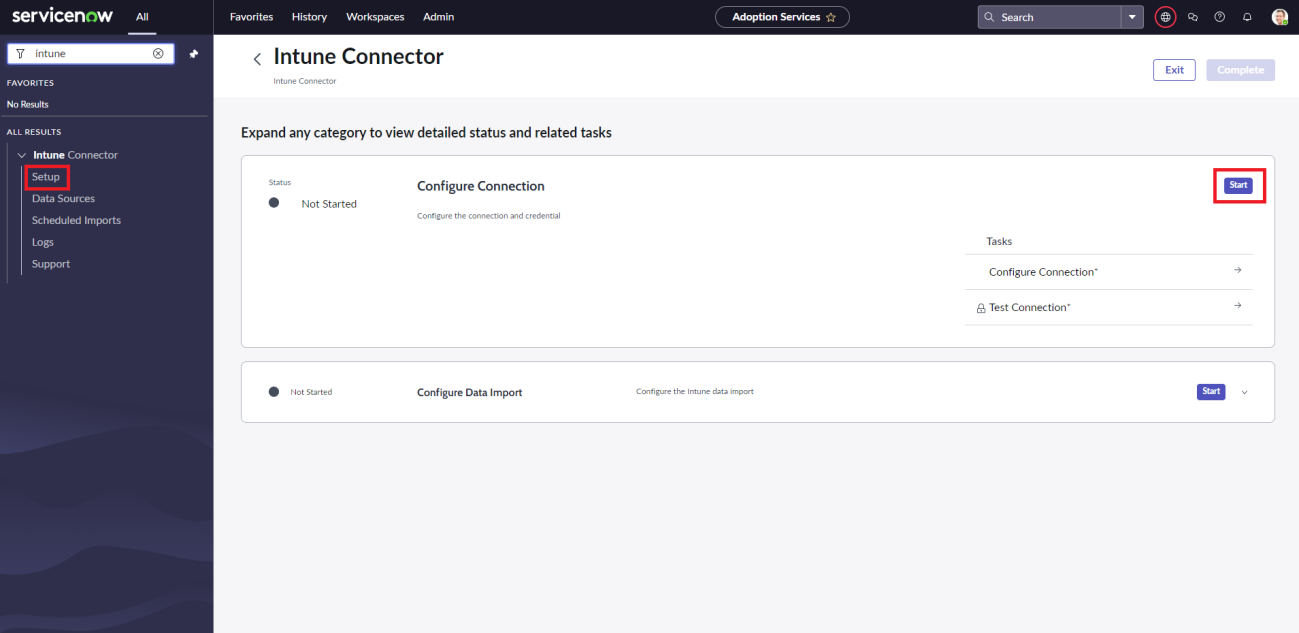
Open the Guided Setup:
- Navigate to the “Setup” module within the Intune Connector application. This setup guide will walk you through each of the configuration steps necessary to complete the setup.
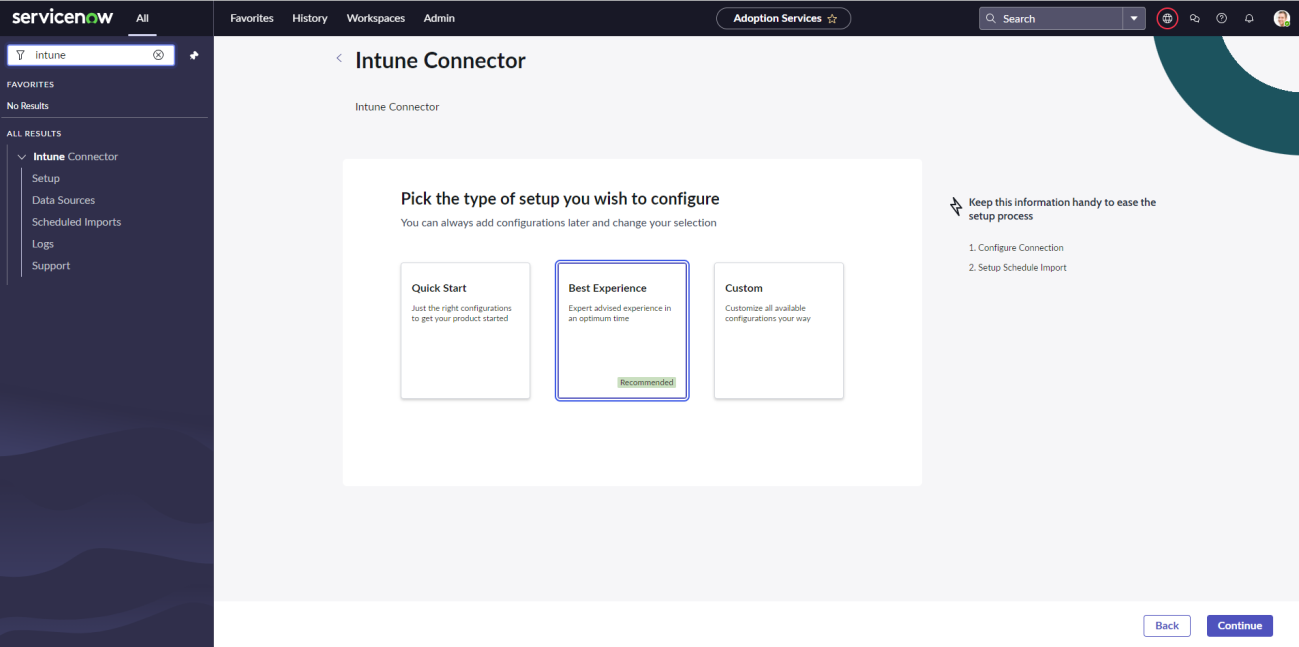
- Continue the Guided Setup by selecting recommended configuration.
2.1 Configure the connection
Note: Before starting configuration make sure you are in Intune Connector scope.
- Start the “Configure Connection” stage.
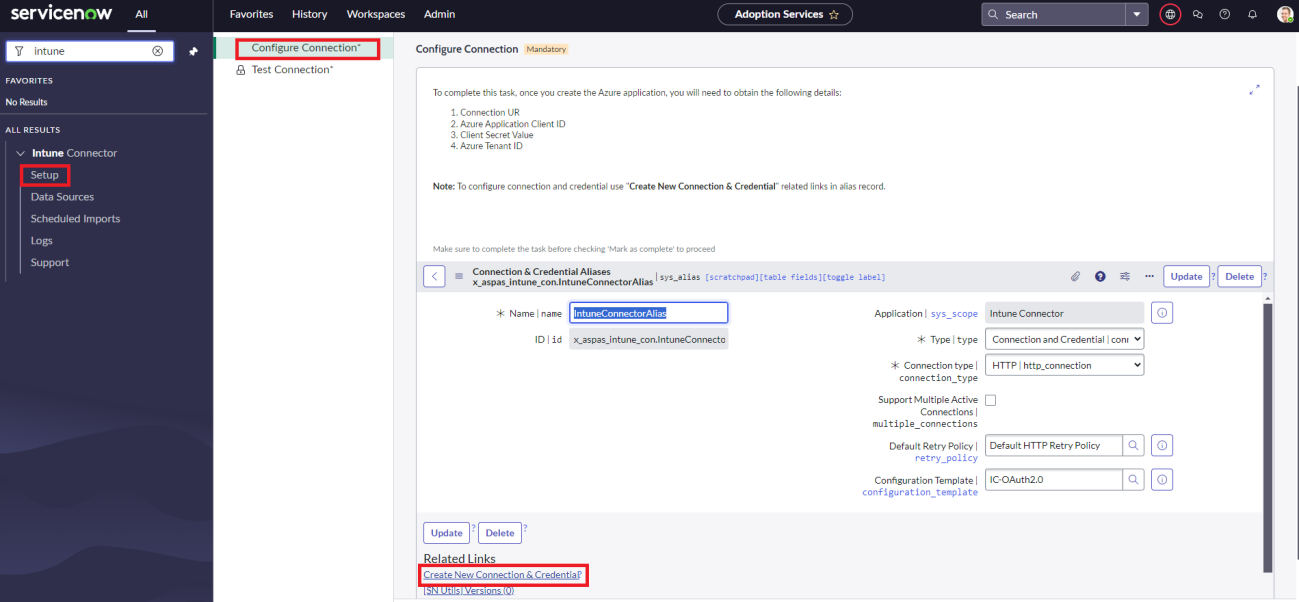
- First guided setup task, you will need to provide the Connection Name and Azure application details. These details include the Connection URL, Azure Application Client ID, Client Secret Value, OAuth Token URL. Click the “Create New Connection & Credential” related link. (for more information see the section 5 External Systems Connections)
- Follow the prompts in the guided setup to input this information and create a new connection record using the provided template. Once completed, this will establish the connection between ServiceNow and your Microsoft Intune environment. Then check the Mark as complete and continue.
2.2 Test the connection
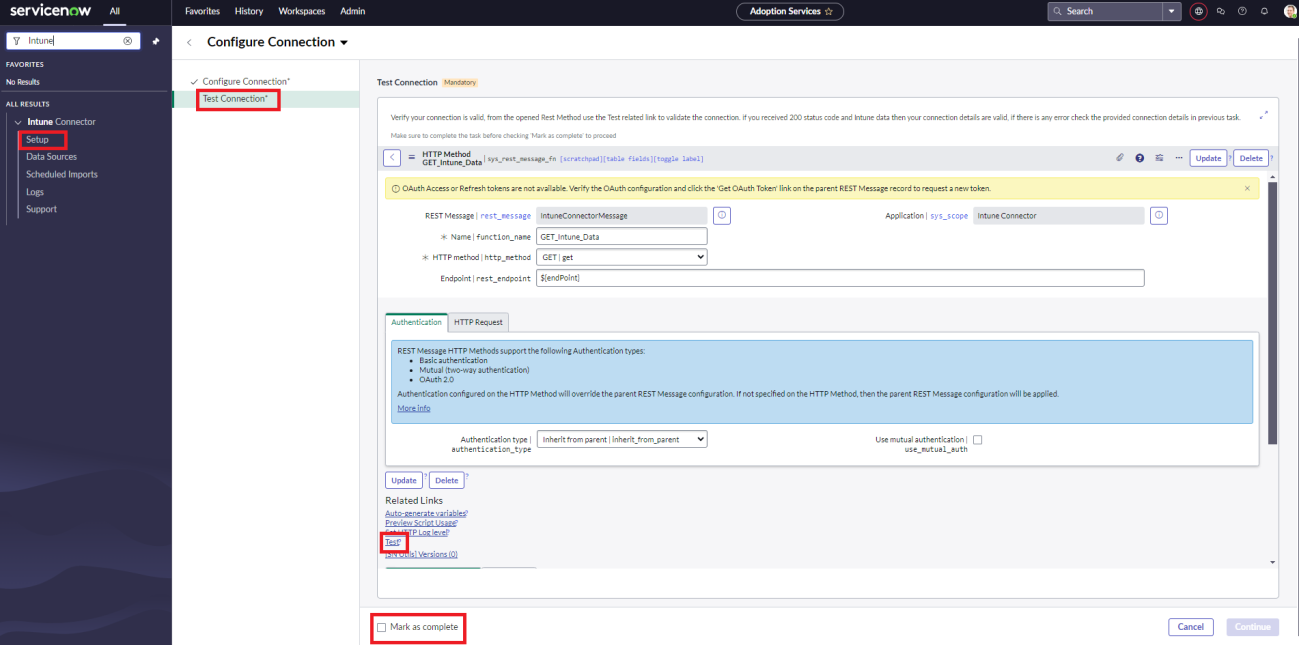
- After configuring the connection, the next step is to validate it. Use the testing task within the guided setup to ensure that the connection to Intune is successful.
- The test will attempt to retrieve data from Intune to confirm that the connection is properly configured and operational. If the test fails, revisit the connection configuration and ensure that all details are correctly entered. After validating check the Mark as complete and continue.
A successful connection is indicated by receiving a valid response from the external system, typically with a 200 OK status code.
This status code confirms that the request was processed successfully, and the external system is accessible.

2.3 Set the system property (optional)
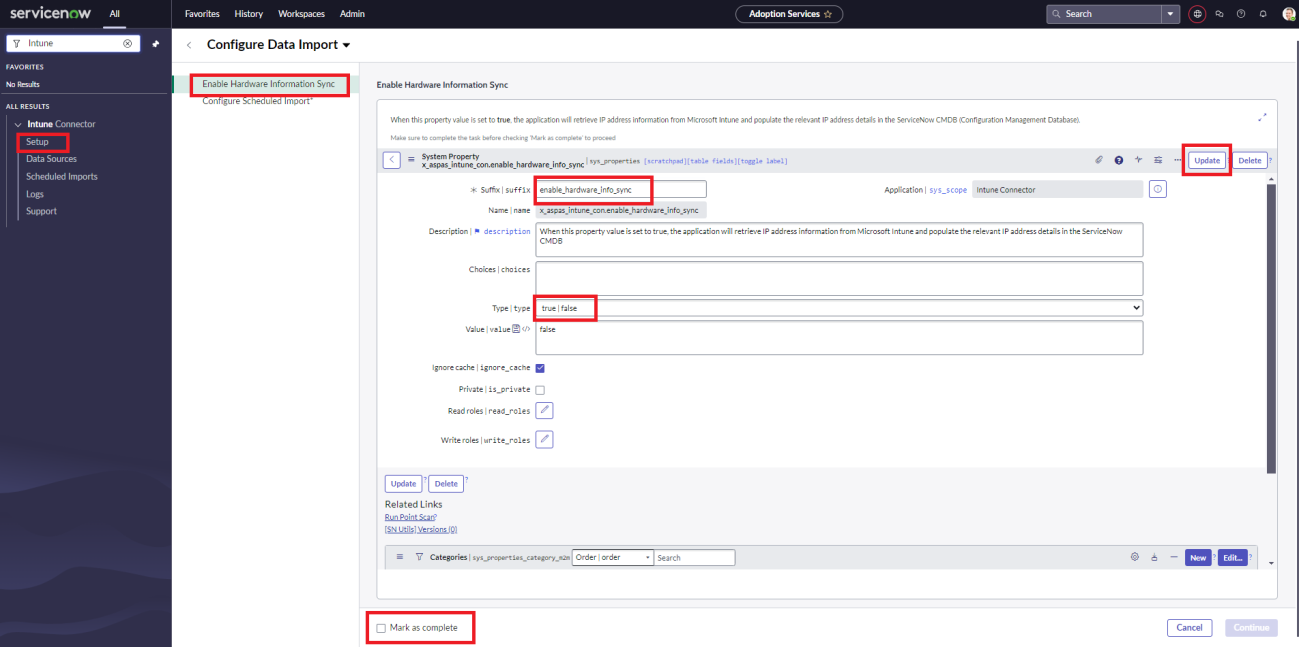
Click on the “Enable Hardware Information Sync” task in setup. This will guide you through the process of setting the property value for hardware information sync. You will be presented with the option to either enable or disable hardware sync.
Note: By default, the property x_aspas_intune_con.enable_hardware_info_sync is set to false (hardware information sync is disabled). To enable hardware information sync, select the option to enable it, which will set the property value to true.
2.4 Configure the Scheduled Imports
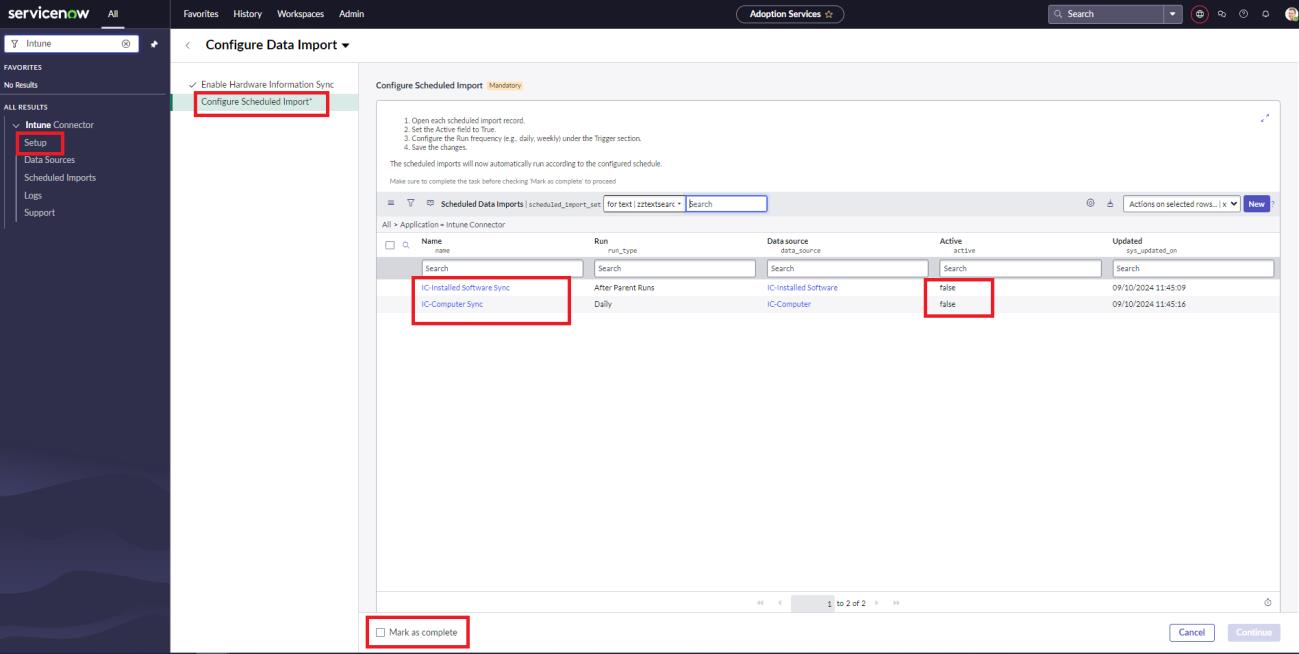
- Once the connection is verified, proceed to configure the scheduled imports task in guided setup.
- In this step, you will activate the scheduled import jobs for Intune data synchronization. You need to enable both the “IC-Computer Sync” and “IC-Installed Software Sync” jobs.
- Additionally, set the running period (e.g., daily, weekly) for each import job based on your organization’s requirements. Ensure that “IC-Installed Software Sync” is configured to run after the “IC-Computer Sync” job, as this will ensure that software data is imported after the related computer records have been updated.
- Note: By default, the Run value for the IC-Installed Software Sync job is set to “After parent Runs”, meaning this job will only be executed after its designated parent job has been completed. The Parent value for IC-Installed Software Sync is set to “IC-Computer Sync”, which ensures that the software synchronization process will occur after the computer records have been imported and updated.
2.5 Completion
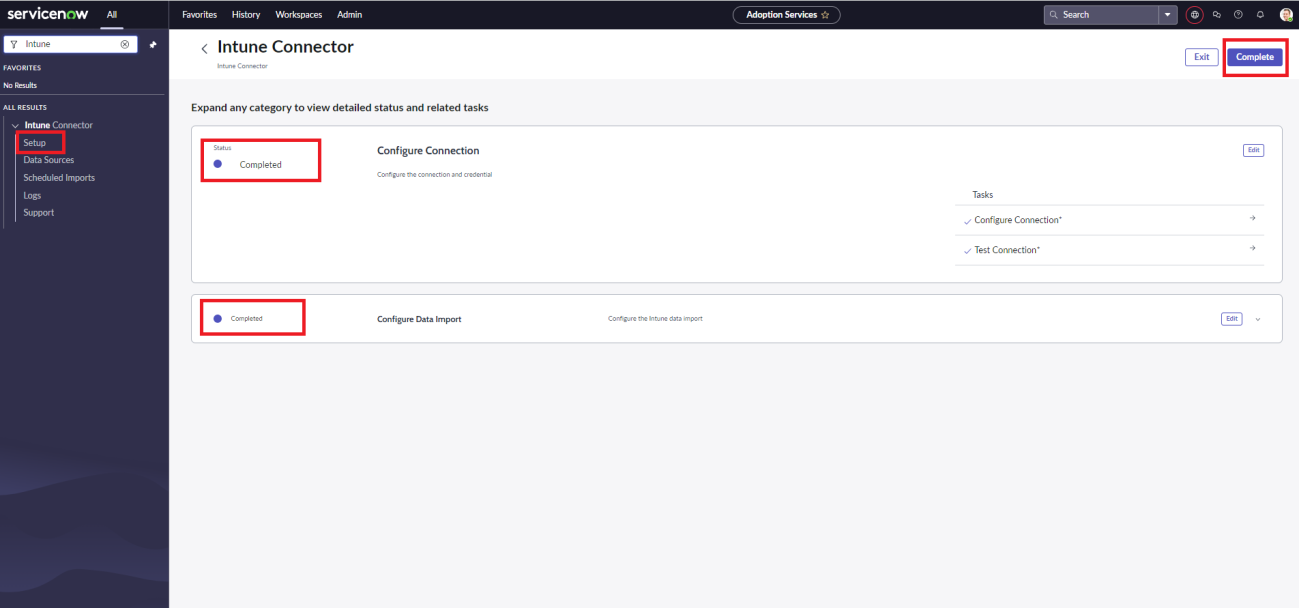
After completing these steps, the Intune Connector application should be fully configured and operational. The application will now regularly sync data from Intune into the ServiceNow CMDB according to the configured schedule.
3. External systems connection
This application requires the creation of an Azure application to authenticate requests to the Microsoft Graph API.
In your Azure portal, create a new Azure application that will be used to authenticate and authorize requests to the Graph API.
Note: To create an Azure application and grant permissions to it, the minimum role required is “Application Administrator” or “Cloud Application Administrator” in Azure Active Directory.
Once the Azure application is created, you need to assign specific API permissions to allow the application to access the necessary data.
The following application permissions must be granted:
• DeviceManagementManagedDevices.Read.All – Allows reading of managed device data.
• DeviceManagementApps.Read.All – Allows reading of application data on managed devices
• User.Read – (Add only if it is not added by default) – Allows the application to read the signed-in user’s profile.
After assigning the permissions, note down the Connection URL, Application (Client) ID, Directory (Tenant) ID, and Client Secret.
These details will be required to configure the connection within the ServiceNow application.
Need support?
Do you have specific needs? Do not hesitate to reach out!
- Support Hours of Operation: 8am – 5pm CET
- Support Days of Operation: Monday – Friday (except Belgium public holidays)
- Contact Details:
- +32 2 895 46 00
- Email: servicenowsupport@asp.be
